

The great thing about IKEA is their stuff is so cheap and simple, it's easy to take it and make it into something new. Here's the "How To" for my IKEA hacked mouse pad.

Step 1: Supplies: IKEA plain white mouse pad (or any cheap old mouse pad, but if you don't use white the background image will show through.) Super 77 spray glue (Regular spray glue won't hold. You need the archival quality of Super 77.) Scissors, Plain white glue, Scotch Guard (Or clear gloss spray paint. I never have Scotch Guard.) and Printable Fabric (This stuff is really hard to find and comes in many different varieties. I use the cotton twill variety. I found mine at Super Joann's and it's pretty spendy stuff. I think it cost me $10 for 5 sheets, so you don't want to waste it. Don't buy iron on transfers or iron on fabric sheets, the heat will melt and warp your mouse pad. I tried that once. And I've never tried the adhesive backed polyester sheets. It seems like it wouldn't hold up to the wear and tear of a mouse pad.)
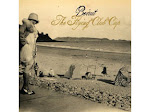
Step 2: Open your image in your favorite photo editing program. (Photoshop all the way for me.) You'll want to adjust your image and make it a little darker and brighter. It always prints lighter on the fabric paper. Print RGB (home printers almost always use RGB color mode.) And high quality (200dpi or more.)
Step 3: Do a test print. Draw and "x" on the top of a regular sheet of paper and determine if you need to load your fabric paper face up or face down. Check the size of your design to make sure it's not going to bleed off the mouse pad. Also check the color of the design you've chosen, and adjust if needed. If it's streaked, clean your heads. Add ink if it's low. It's best to print these right after you add a new ink cartridge. Print at 50% if you want to save ink. Just don't forget, and change it back to 100% before you actually print the mouse pad.
Step 4: Print your mouse pad. I'm not going to lie to you. It's going to jam... at least 15 times. And you may even break your printer. Fabric paper pushes poor little desktop printers past their limit. And your printer will probably hate you for life. But there are things you can do to prevent paper jams. Use photo paper setting, let your printer know you're trying to print on something really really thick. Don't print the fabric paper by itself. Fill your printer's paper tray FULL of paper so there's just enough room to load the fabric paper on top. Then tape down the regular paper so the printer won't grab it on mistake and try to run two sheets together. Filling the tray full of paper pushes the paper higher toward the grabbers and then it squishes the paper down a little bit pushing it through. It will probably still jam. But it's going to help.
Step 5: After you have successfully printed your design. Let it dry completely. At least a half hour. You don't want it to smear.
Step 6: When it's dry, peal the paper off the back. (If it's that type of fabric paper.) The instructions on the package say to run it under cold water, which I did last time and regretted. It stretched the image and frayed the fabric. And I'm still not sure why you're suppose to do it. Perhaps to wash the glue off the back? Anyhow I skipped that this time and ended up with a much better mouse pad.
Step 7: Spray the back of the image and front of the mouse pad with Super 77. Do this OUTSIDE! Then stick them together, and let it dry completely, at least a half hour.
Step 8: Cut it out. Since IKEA mouse pads are round the top will always show. I usually cut mine out with scissors. It's always a little ragged. But I can't find a better way to cut them. If you find one, please let me know.
Step 9: Scotch Guard or clear coat the top. Mouse pads take a lot of wear and tear and you will inevitably spill coffee or tea on it at some point. Take precautions now! Give it some type of protective layer. Spray this outside too.
Step 10: Glue the edges to prevent fraying. Just run a little Elmer's Glue, or Tacky Glue or Mod-Podge or whatever type of glue you're into, around the edge of the fabric and foam. It will really help in the end. Let it all dry... and there you have it! You've very own custom made mouse pad. For only about $3.50... assuming you only use one sheet of printable fabric and a little ink.
Enjoy and have fun crafting,
T


1 comment:
How fun!! What a creative project!
Post a Comment